任务
“这里有本书,把这本书我折起来的页面拿去扫描一下,然后把里面的表格做成一个excel。”
这短短的一段话让我的心里紧了三紧,什么“读取扫描件”,“扫描件里面的表格”,“转成excel”。
每一个环节单独拿出来都可以做文章了,但是今时不同往日。我这下是可以站在巨人的肩膀上了。
首先明确的是,将表格转为excel一定不能靠人工,不然这小命得搭在这了。
1 | |
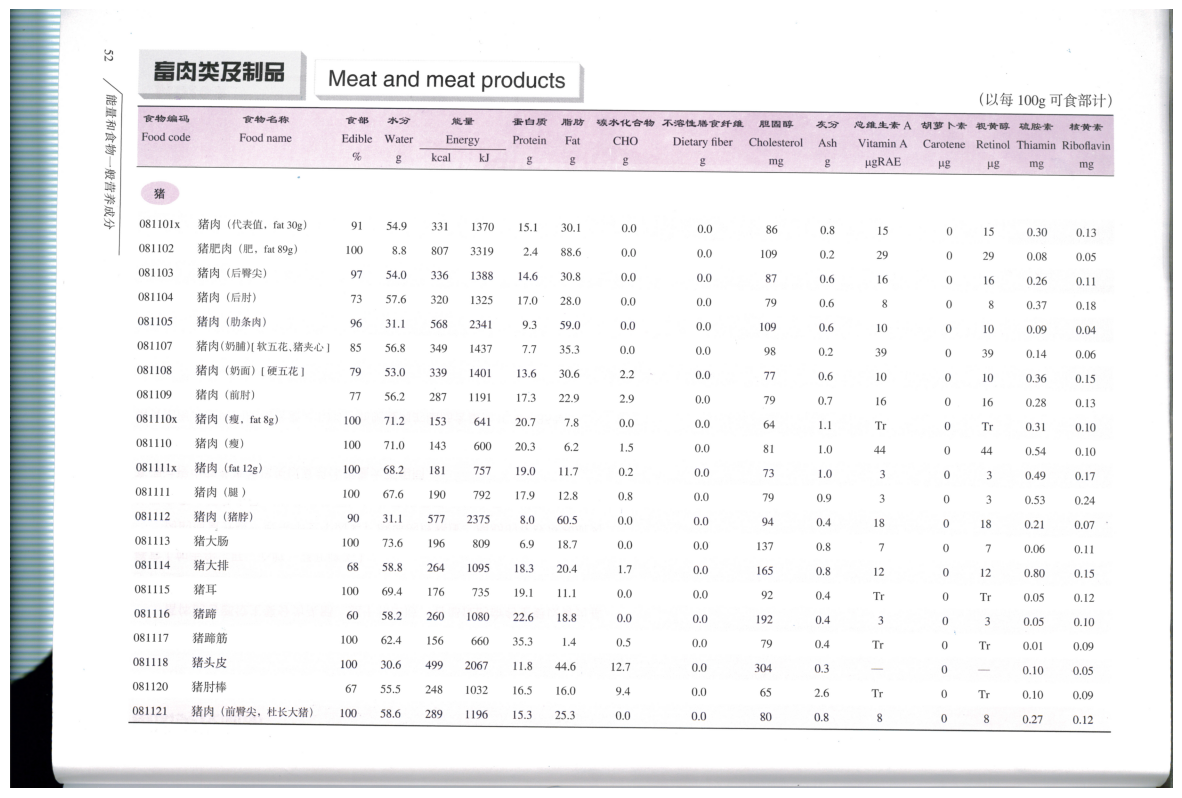
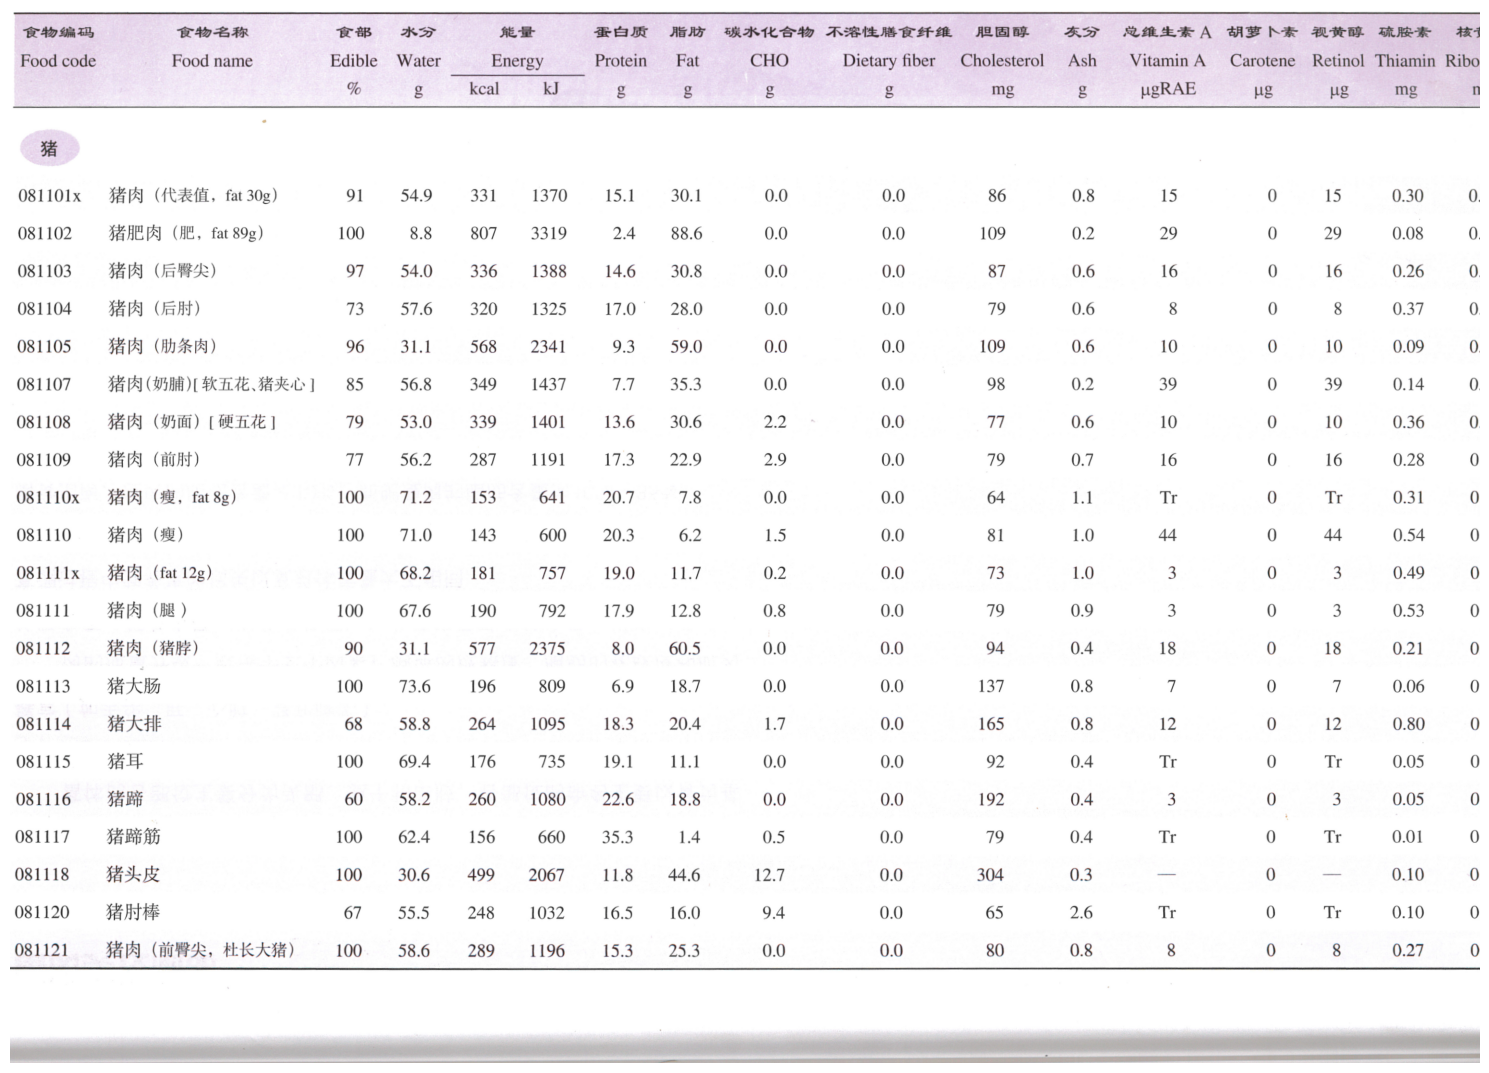
可以看到这个表格长这样,周围还有其他的信息,表格边缘不明确,并且图片可能因为扫描时的动作出现倾斜。
到这里我已经头大,但是毕竟是工作。
开始
先是图片特征分析
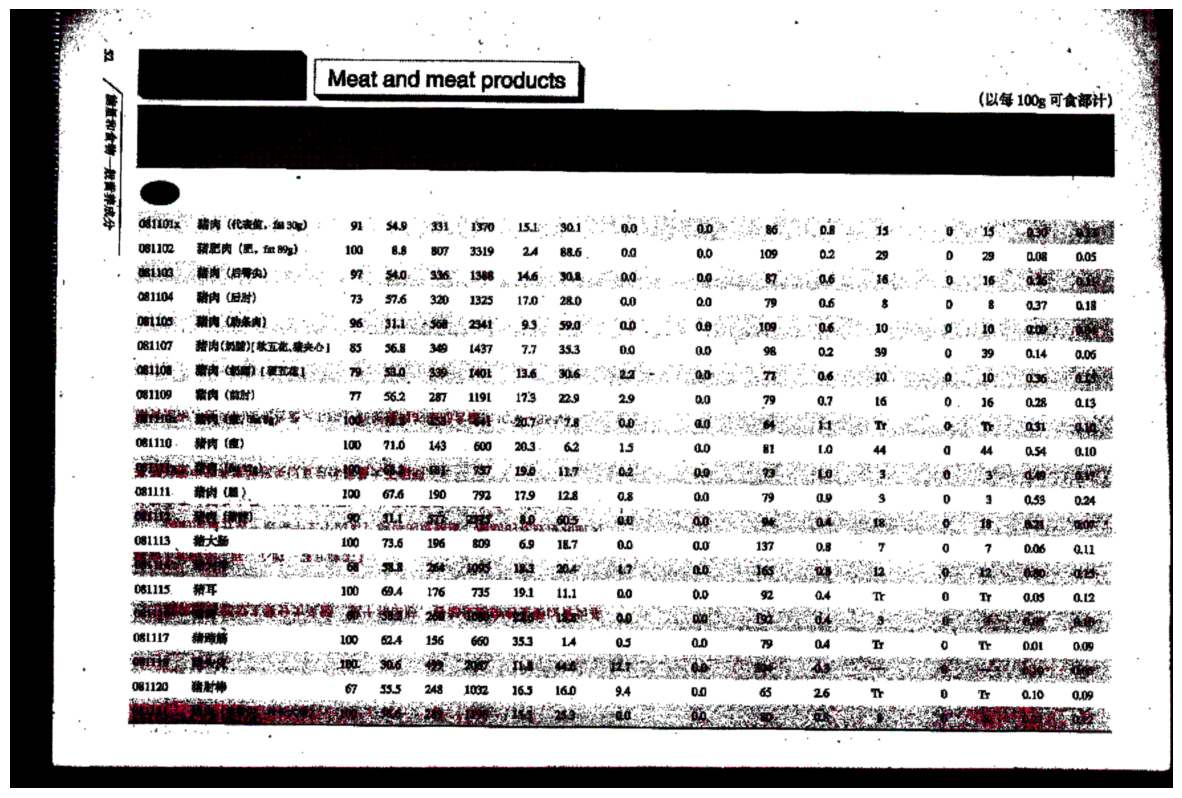
1 | |

看到图片中有一块较大的方块(表头)我认为可以从这里做文章。
先极端处理,这一步主要是看看是否还有其他能够利用的特征信息,
似乎价值较大的也就只有表头的那一个矩形了。
去除一些噪声:
1 | |
来一套组合拳,提取我们需要的特征部分:
1 | |
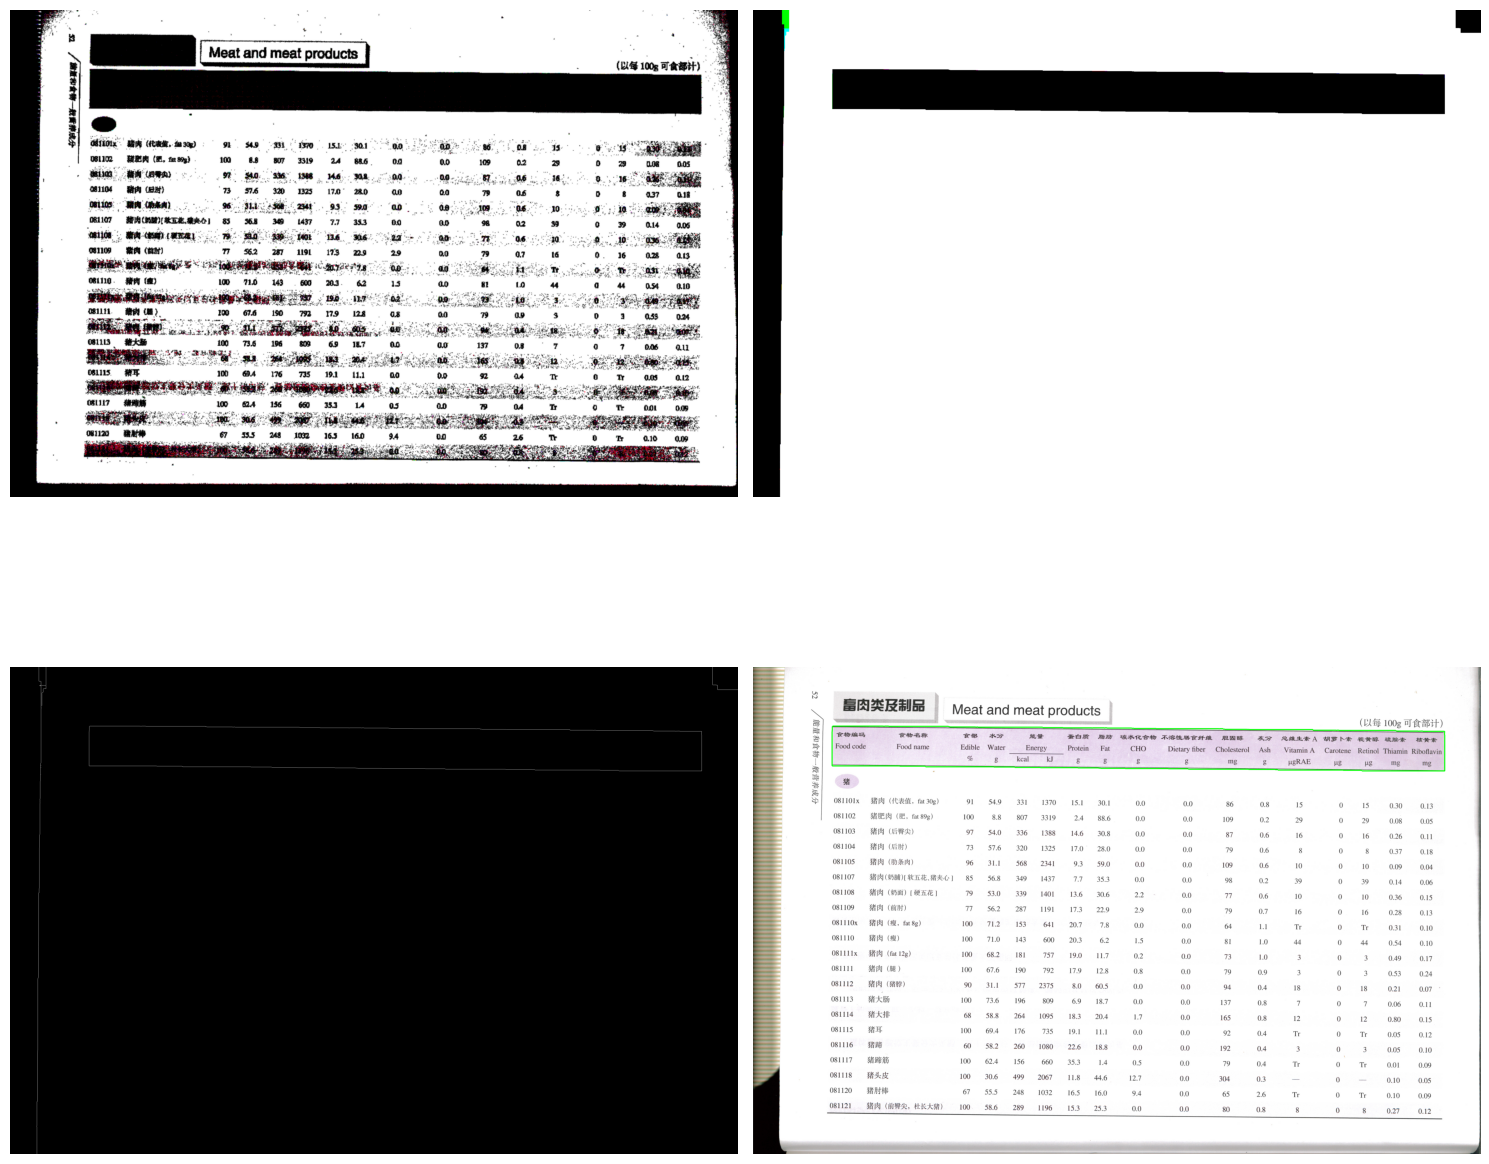
既然如此,那么就可以用这个特征进行图像校正了:
1 | |
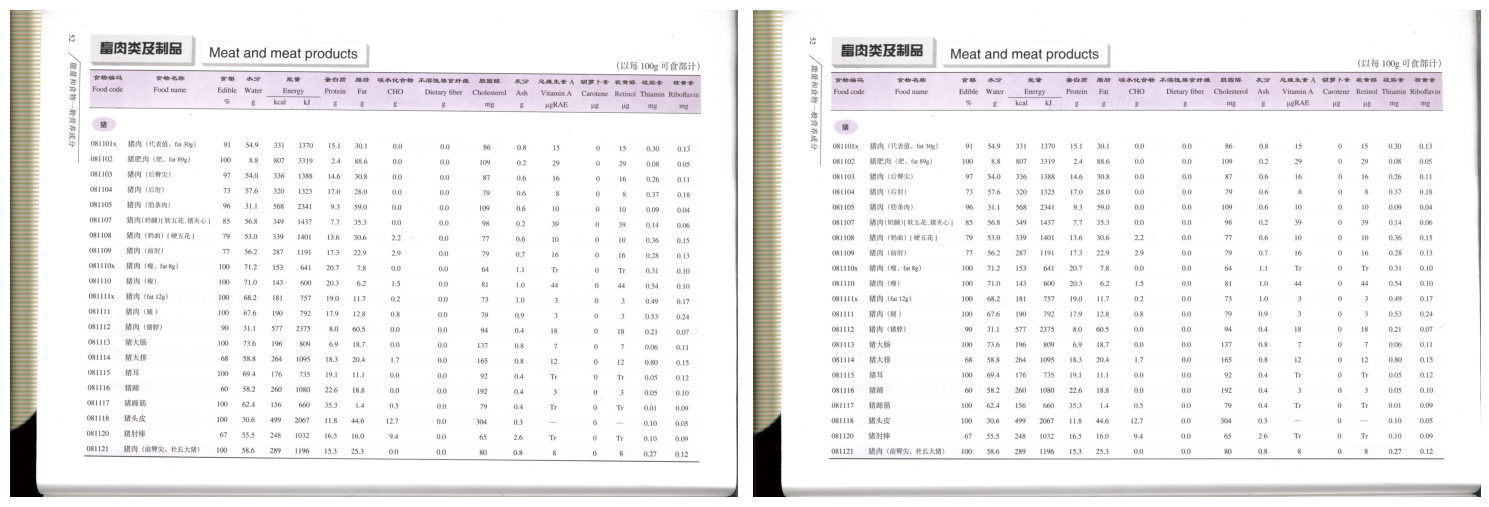
到了这里能看到其实周围还是有一些额外的信息需要去除,我使用了最少保留的方法(这样对需要的内容部分损失会很大,需要根据自己的情况进行选择
1 | |
最后进行二值化:
1 | |
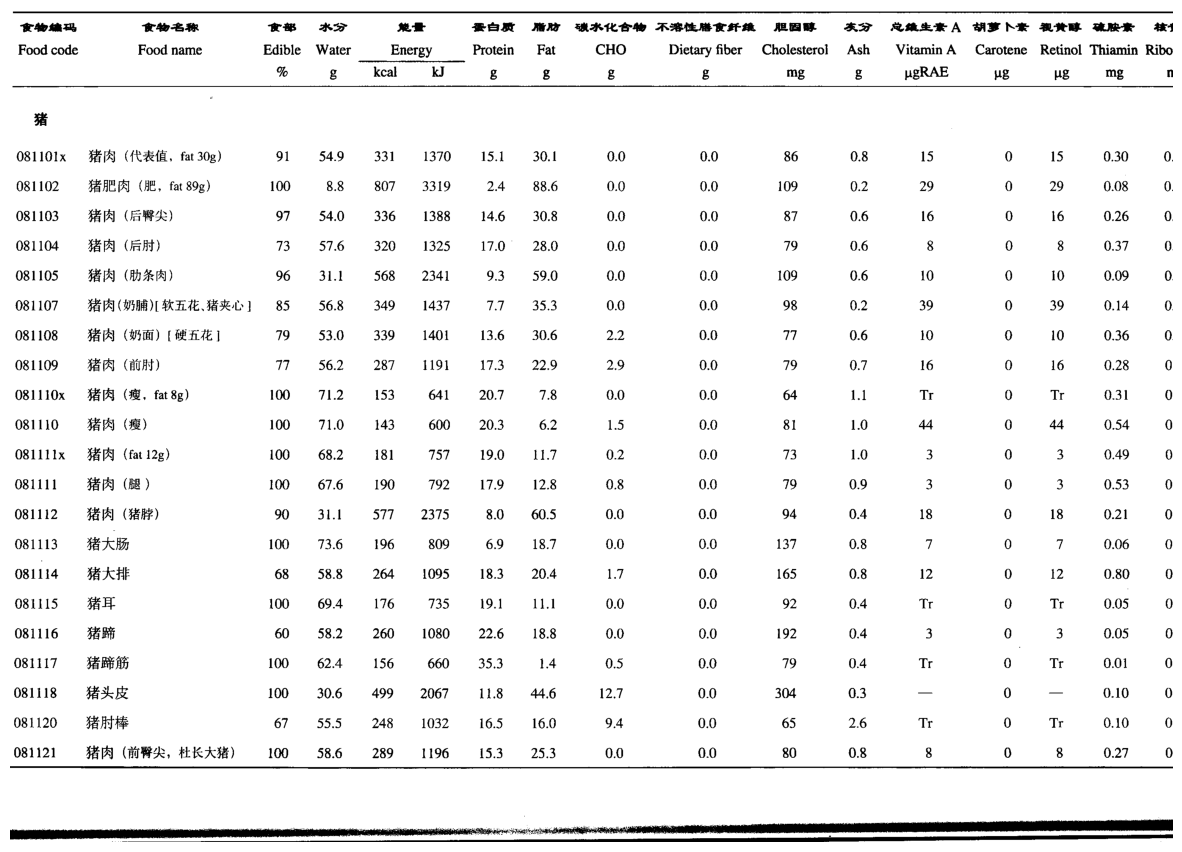
到了这里就差不多了,然后就是将这个流程通过AI编写为批量的脚本处理 输入文件夹 输出到 输出文件夹
最后通过代码将图片进行合并到pdf
1 | |
这算是比较普通的思路了吧,能力有限也不知道是否还能够精进一些,就这样吧。